Saturday 27 August 2016

                                                                                                                       **PRESS SAMPLES**
Hello Lovely Ladies!
As most of you know, my track record with nail vinyls hasn’t been all that successful in the past, but as the Canadian country singer, Shania Twain, sings “I ain’t no quitter”; so when WhatsUp Nails contacted me to try out their new line of nail vinyls I was in!  Pumped to give them a try!
Come join me on my FIRST SUCCESSFUL nail vinyl adventure!


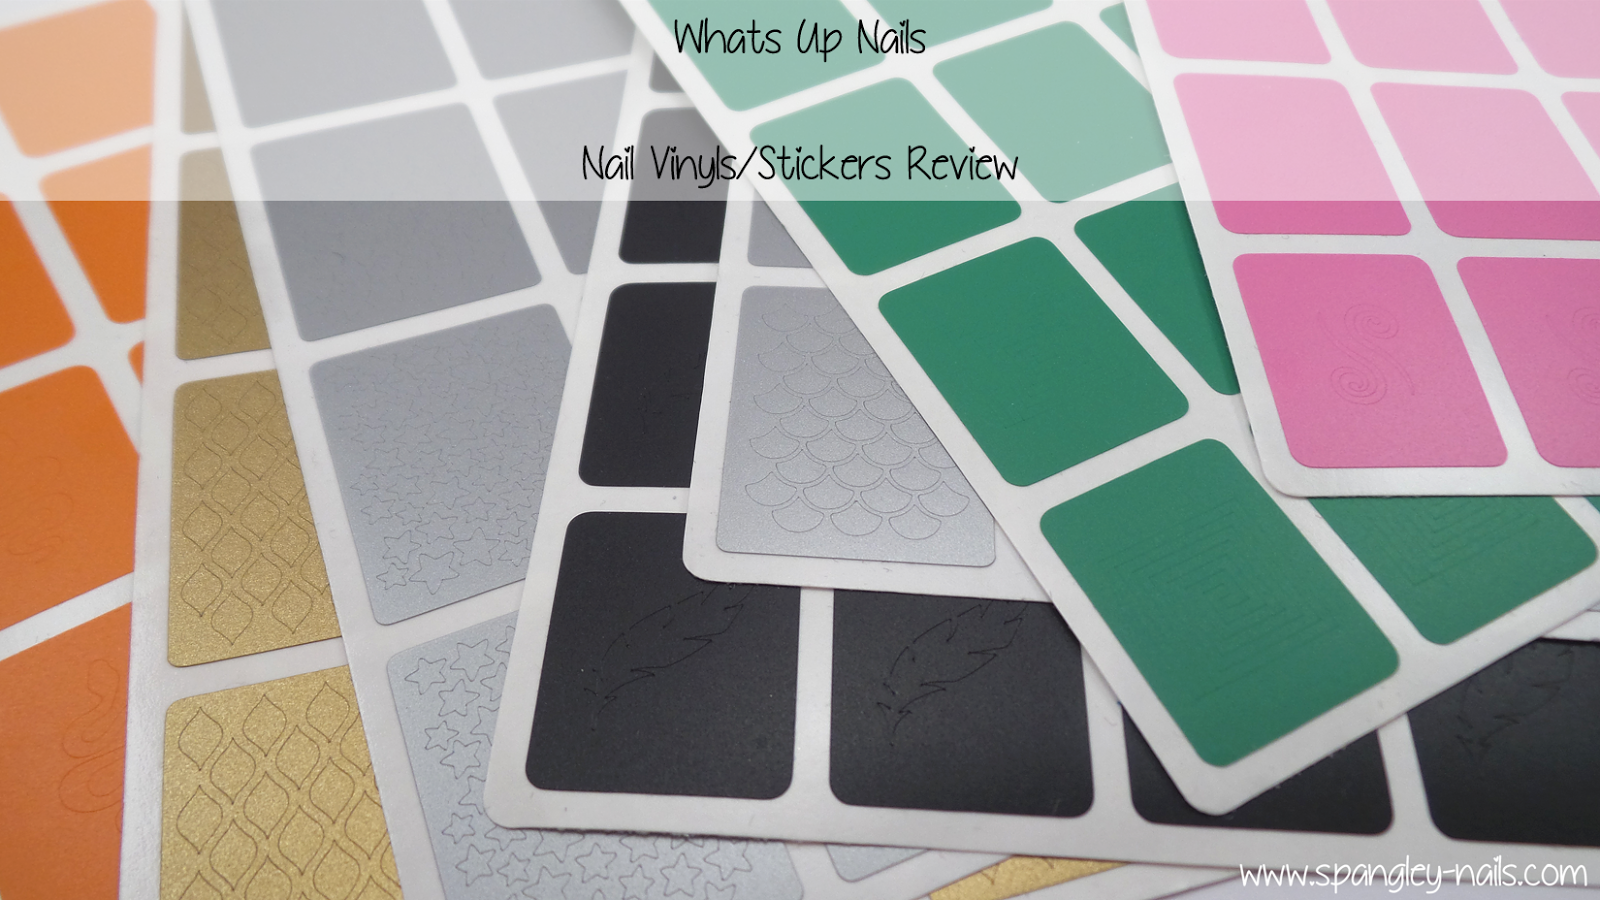
Whats Up Nails has just recently added nail vinyls to their online store, and they have done a GREAT job to make them day-to-day wearable and on trend.
They are made of high quality vinyl in Arizona, USA.
Each sheet retails for $3.75.
Each stencil size is 7/8in x 1 1/8in (22mm x 28mm).
I chose to try the rose vinyls first; I discovered that they are perfect to cover the entire nail and ideal to cut in half to create accents and visual interest.

The ‘negative space’ bits can be poked out with a dotting tool OR you can stick the vinyl onto a non-glossy surface and pull it off (this will leave the ‘negative space’ bits behind, leaving you with the vinyl structure).
Arrange and apply the vinyls onto the nail.  My recent transition into soak off gels has made this step FOOL PROOF!!!!! SOG is instantly dry upon curing (as long as the dispersion layer is wiped off, you will have vinyl success each and every time!!!!!!).  If you are working with regular polish, you must wait for the base color to be fully dry (so that the vinyl doesn’t lift the base color when you go to remove it).
I was hoping for a distressed look, so I used a cosmetic sponge to dab on some black over the vinyls.

I then quickly dabbed on some Cirque Colors Reflector.  The sponging process should be done rather fast, as you want to pull off the vinyls before the polish is fully dry.
I was so incredibly impressed at how the rose detail stayed in tact with these WhatsUp Nails vinyls!  I absolutely LOVED this vinyl experience… I feel like I am a changed woman!
WhatsUp Nails has generously sent me quite a few other vinyl designs.  With a number of the vinyls you can use the ‘framing’ OR the negative space fragments so each little section can be used twice to create inverse designs (if you know what I mean)…WhatsUp Nails refers to them as stickers and stencils.


I feel as though I jumped a mega hurdle with these WhatsUp Nails vinyls… I have overcome my fear of nail stencils and I am sooo looking forward to using more of their designs.
You can shop online with WhatsUp Nails HERE and check out their nail vinyl collection HERE.

UberChic Beauty Wild West 02 REVIEW


I then double stamped the image first in white and then in black using UberChic Beauty’s XL clear stamper (I will do a separate full review on this stamper soon, but it has come in soooo handy with the longer nails that I have recently been sporting).  I made sure to slightly overlap the stamping.  I really like how much depth this technique of black on white creates. 

Hello Lovely Ladies!
*breathe in, breathe out*
I literally hyperventilated a little when I unpacked this plate from its shipping box.  Everyone has their own preferences for stamp images, and this plate fits so well with the images that I personally gravitate towards.  Without further ado, please allow me to review UberChic Beauty Wild West 02 for you!


UberChic Beauty Stamping Nail Art Plate – Wild West-02

Take a trip to the West and let your fingers embrace every flavor, every pattern and every essence that this rugged terrain has to offer. From tribal patterns to arrowheads, bears to barbed wire – this plate has so many excuses to let your creativity take flight.
The designs are 17 x 21mm – the largest single designs we know of in the industry – and are built to cover edge-to-edge even the largest natural nail size.
The size of each UberChic Beauty plate is 9.5cm by 14.5cm
This plate comes with a protective backing as well as a blue film that must be removed before use.
Let’s take a closer look… remember, slow and easy breaths…


This plate deserves to be studied image by image… both the full nail designs as well as the smaller individual images have so much style and personality!
I love the clean lines and the busier tapestry-like images. Look at the feather image at the top as well!
I cannot wait to try these images!!!!!  They go so well with earth-tones and neon shades.  
I ADORE me some triangles and this plate is packed full of them!
Just you LOOK at all of the detail in this wolf!
*swoon*… plain and simple.
To create today’s manicure I started with a smoosh base… I basically pulled out every bright neon-ish shade I owned: blue, purple, coral, pink, peach and smooshed them all together with a stamper.

 
The accent nail is still Semilac Diamond Bling (recycled from a few of my previous manicures).
The UberChic Beauty Wild West 02 nail stamping plate can be purchased HERE and retail for $14.99
And while you’re uber shopping… don’t forget to get the Uber Mat! *wink wink, nudge nudge*
Where to Find UberChic Nail Stamping Plates:
www.UberChicBeauty.com

Thursday 25 August 2016

LVX Summer 2016 Collection with Lemon Saffron Seasoning & New Nail Art Brushes

Lemon Saffron Nail Art & New Brushes

The LVX Summer 2016 collection features 6 colors that completely represent the good vibes of summer. I've already used LVX for lemon nail art in the past, but I was struck by another pretty lemon pattern that I thought went well with some of these colors, so here's LVX in lemon, part two!

Lemon Saffron by Katy @ Nailed It www.blognailedit.co

These baby lemons were probably about as easy as raising an actual baby, with tweezers. And I still didn't get the level of detail I wanted. I'm really excited about the brushes I used for the designs though. If you're a nail artist, you've probably amassed at least 43 brushes for detailing your designs. I've got another 3 you need to add - the Winstonia Berry Wine brushes.

Winstonia Berry Wine Brushes

The bristles on these 3 brushes are very thin, which makes detailing easy and controllable. You don't even need to trim them, as the shortest one is the perfect length.

Winstonia Berry Wine Brushes

I've already used mine, so it doesn't look as thin as the freshly unpackaged ones, but trust me, you need it, especially if it's only $5.95!

LVX Summer 2016 Swatches

LVX - Saffron
LVX - Saffron
Now, I know you all know how big of a fan of yellow I am. My blog's been yellow for years, and every post that includes a yellow raves about it, but Saffron (2 coats) was a tricky beast, even though it ultimately produced a gorgeous mani. In fact, truth time - I used my blog's name to cover up some of the messy yellow cleanup that failed on my ring finger in the nail art shot. See it? If you get any of this shade on your skin, you'll be stained a bit until a few hand washes sloughs off those stained layers of skin. The taxi yellow also has a bad formula, almost like an old polish that's dried out and has become thick and gloppy.

LVX - Bon Bon
LVX - Bon Bon
Bon Bon (2 coats) is a baby bubblegum pink with a normal, controllable formula.

LVX - Coquelicot
LVX - Coquelicot
Argh this is so frustrating! The two colors I was most excited about, Saffron and Coquelicot (2 coats) have awful formulas. This bright orange-red creme couldn't smooth out well no matter how quickly or slowly I moved.

LVX - La Mer
LVX - La Mer
La Mer (2 coats) was a pleasure of a formula, and an interesting color too! It's a dark but bold tealy blue. You can see that even in the nail art up above, it works well and doesn't show colors beneath.

LVX - Lush
LVX - Lush
Lush (2 coats) is a lovely sage creme polish with the formula I expect from LVX - easy to apply and covers easily in two coats.

LVX - Serene
LVX - Serene
Serene (2 coats) is a sky blueish-periwinkle creme with another easy formula.

I want to recommend the whole collection to buy, but I'm so frustrated with the awful formula of Saffron and Coquelicot that I simply can't. So pick and choose what you like from the collection here, but do NOT miss the Berry Wine brushes from Winstonia here!

Wednesday 24 August 2016

Whats Up Nails Store & Nail Vinyl/Sticker Reveiw

                                                                                                                 **PRESS SAMPLES**

You guys will know by now that I love my nail vinyl's.  They make for a quick and easy manicure in minutes, with no fuss or stress.  I have some vinyl's & stickers from the store Whats Up Nails to share with you today.  Whats Up Nails is an online store selling everything from Nail Polish, Nail tools, Charms and Stamping Supplies, and is run by Lena from Nails By Freckles.

You might remember I used a few of their holiday vinyl's around Christmas time, and I had nothing by praise for the way they performed.  Keep on reading for the manicures I've created this time around, as well as why I think they're different to any of the other vinyl companies out there...

As you know, I usually prepare around 4 manicures for these reviews, but I got a bit carried away and made 5 haha!

This is their Stars Stickers & Stencils.  I had been dying to use this vinyl with my new China Glaze polish, which I didn't top coat over and I love that the texture adds dimension to the stars.

I've had that little Snake Charm for what seems like forever now, so when I got the Fishnet Stencils, I thought they looked like snake skin, so I had to pair them with my little snake guy for a manicure.

This manicure features the Diamond Pattern Stencils.  Again, with the Rimmel Space Dust polish being textured, I did an gradient effect towards the end of the nail for more dimension.

Scale (Mermaid) Stencils oh, how I love you!  More textured polish for a 3D like effect complete with Pearls and Sea Shells.

Finally,  this manicure features a sticker from the Eiffel Tower Stickers & Stencils Set. 


Where can I buy these vinyls/stickers?  Straight from Whats Up Nails by clicking here.

Additional Comments:  One thing that sets Whats Up Nail Vinyls apart from the rest is the unique way they cut their vinyls in terms of the sizing.
You can see from the picture below of their Christmas Tree Vinyls, that can be used as a sticker or a stencil, that the top tree starts small and the trees get bigger as you go down.
I think this is a great idea and ensures that the vinyls cater for every nail shape and size.


Friday 5 August 2016

Cool Matte Nail Art Designs

Women have always been conscious for the beauty of each and every part of their body from head to toe. But sometimes they ignore a very important part of their body, i.e. nails. Blaming lack of time and expenses of maintenance, they do not pay attention towards beautifying their nails. So, through our website, we regularly bring different ideas of beautifying your nails and variety of nail art techniques that not only take less time to do but are also inexpensive. If you follow our tips, you can give as stunning look to your nails on your own as some professional salon can give.

Today we are introducing you to a different class of nail paints that are not only easy to apply but make a different impression on your nails. This is nothing else but Matte nails. Whether you believe or not, but matte nails have an exceptional tendency to make everyone fall for it.

Matte nail paints give such a unique look to your nails, that no one can overlook them. If you like being the centre of attraction, try matte nails for sure. Matte nails are a terrific style to conquer all other nail techniques. Matte nails are a perfect alternative if you do not like flashy nails.

Some women face a problem that their glossy nail paints do not stand appropriate with their work or school atmosphere. Some of them also do not like flashy nail paints. If you are also one of them, then we have a solution for you which is nothing else than matte nails. This unique style will suit your elegant and classy look as well as the intense work atmosphere. You can also calm down the clutter of the colour virtually by appending a matte top coat to alter the texture.

Although glitter nails are very eye catching and attract everyone, but sometimes there is a need to give sophisticated look. If you also have the same opinion and like your style to be more age-appropriate, then I would suggest you to definitely go for matte nail paints.

Matte nail paints have another positive aspect. By applying multiple coats of matte nail paints, you can conveniently proceed to apply to a manicure in order to design it down vehemently without missing the polished pattern of the nails.

So, instead of spending bucks in parlours for getting these nail arts done, just follow our website that can teach you different nail arts in some simple steps making you more creative and saving your time as well as money. Some of the other ideas for matte nail art .We hope that you enjoyed visiting our website and this blog. We assure to keep bringing new nail art trends regularly to you and fascinate you with the most interesting and attractive artworks. Keep visiting our website for new updates. And don’t forget to post your comments about this post. You can also share your different nail art experiences with us.

 HERE IS A DIY MATTE NAIL POLISH TUTORIAL :


Wednesday 3 August 2016

Review- What’s Up Nails Stencils

I have been having SO much fun playing around with these vinyl’s from What’s Up Nails since I received them. Today I have a bit of a review to share with you, and you’ll probably see them around the place a lot over the next few weeks!
 What’s Up Nails is a US based store that stocks all kinds of nail art supplies, polish, nail care, and lots, lots more! They contacted me a little while back to review some of their vinyls and I jumped at the opportunity, having seen some super exciting products around. I hope you’ll enjoy the manicures I’ve create here today!
First up I have this look I created using their Thorns Nail Stencils. These are just the cutest! I love this pattern so much!
This manicure was one of my potential Dotticure looks for last weeks PATN Link-Up, however I ended up making something else so thought I would share these here.
I used What’s Up Nails Roses Stencils to create this look. My base is Powder Perfect Turtledove, and I applied Robin Hood and Maid Marion to create the roses. The dots are done using Watchful Nights, also by Powder Perfect.

Lastly today I have this look which is one of my favourites of the three! For this I used What’s Up Nails Hearts Stencils. How dang cute is it!!
My base is Emily de Molly Enchanted Dagger and the hearts were made using Impenetrable Cloak, also by Emily de Molly. You can read more about these two polishes here.

So what did I think about the vinyls? Well, I really enjoyed using them for one. The detail and crispness in the designs is spot on, and I found the pieces weeded out exceptionally. The vinyls stuck to my nails really well and without the issue of coming up at the edges where my nails curve which was great. For all three of these manicures I didn’t sponge on any of the polishes, just brushed it on with the nail polish brush so I think that they must have adhered so well to still create that kind of line accuracy.
Because of all this, I am more than happy to recommend to you to try these vinyls for yourself if you haven’t already. I am addicted!!
I GOT MINE AT :-
http://store.whatsupnails.com/

So now tell me, which of these is your favourite?